# 支持的电子秤
支持类型:
Name | Model | Picture
--- | --- | ---
[Mi Smart Scale 2](https://www.mi.com/global/scale) | XMTZC04HM | 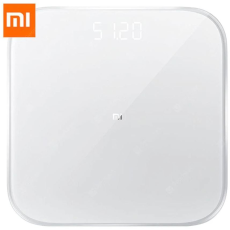 [Mi Body Composition Scale](https://www.mi.com/global/mi-body-composition-scale/) | XMTZC02HM |
 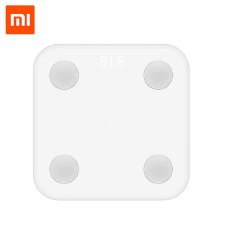 [Mi Body Composition Scale 2](https://c.mi.com/thread-2289389-1-0.html) | XMTZC05HM |
  急着出,汉化后续调整!!!(冬瓜备注)
# Setup
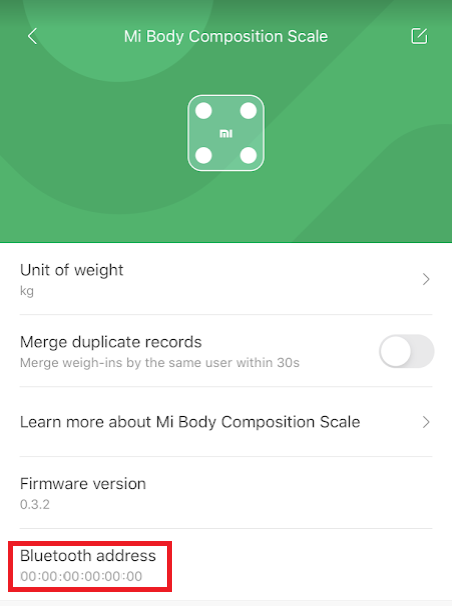
1. Retrieve the scale's MAC address from the [Xiaomi Mi Fit app](https://play.google.com/store/apps/details?id=com.xiaomi.hm.health&hl=en&gl=US), or alternatively, you can also use the `bluetoothctl` tool on Linux and type `scan on` to scan for BLE devices (`sudo hcitool lescan` might also work). The device should be named `MIBFS` or similar.
急着出,汉化后续调整!!!(冬瓜备注)
# Setup
1. Retrieve the scale's MAC address from the [Xiaomi Mi Fit app](https://play.google.com/store/apps/details?id=com.xiaomi.hm.health&hl=en&gl=US), or alternatively, you can also use the `bluetoothctl` tool on Linux and type `scan on` to scan for BLE devices (`sudo hcitool lescan` might also work). The device should be named `MIBFS` or similar.
 1. Open Home Assistant and navigate to the "Add-on Store". Click on the 3 dots (top right) and select "Repositories".
2. Enter `https://github.com/lolouk44/hassio-addons` in the box and click on "Add".
3. You should now see "Lolouk44 Add-Ons" at the bottom list.
4. Click on "Xiaomi Mi Scale", then click "Install".
5. Under the "Configuration" tab, change the settings appropriately (at least MQTT parameters, user properties, and MAC address), see [Parameters](#parameters).
6. Start the Add-on.
## Important:
If using the Add-On outside of Home Assistant Operating System / through a docker container, make sure the dbus is shared with the container running Home Assistant. This is typically done by adding the following line in your docker run command:
`-v /var/run/dbus/:/var/run/dbus/:ro`
or the following lines in your docker-compose file:
```
volumes:
- /var/run/dbus/:/var/run/dbus/:ro
```
## Parameters
Option | Type | Required | Description
--- | --- | --- | ---
HCI_DEV | string | No | Bluetooth hci device to use. Defaults to `hci0`
BLUEPY_PASSIVE_SCAN | bool | No | Try to set to true if getting an error like `Bluetooth connection error: Failed to execute management command ‘le on’` on a Raspberry Pi. Defaults to `false`
MISCALE_MAC | string | Yes | MAC address of your scale
MQTT_PREFIX | string | No | MQTT topic prefix, defaults to `miscale`
MQTT_HOST | string | Yes | MQTT server, defaults to `127.0.0.1`
MQTT_USERNAME | string | No | Username for MQTT server (comment out if not required)
MQTT_PASSWORD | string | No | Password for MQTT (comment out if not required)
MQTT_PORT | int | No | Port of your MQTT server, defaults to 1883
MQTT_DISCOVERY | bool | No | Whether you want MQTT discovery for Home Assistant, defaults to `true`
MQTT_DISCOVERY_PREFIX | string | No | MQTT discovery prefix for Home Assistant, defaults to `homeassistant`
DEBUG_LEVEL | string | No | Logging level. Possible values: 'CRITICAL', 'ERROR', 'WARNING', 'INFO', 'DEBUG'. Defaults to 'INFO'
USERS | List | Yes | List of users to add, see below
Auto-gender selection/config: this is used to create the calculations such as BMI, Water/Bone Mass, etc.
Here is the logic used to assign a measured weight to a user:
- If the weight is within the range of a user's defined values for GT and LT, then it will be assigned (published) to that user.
- If the weight matches two separate user ranges, it will only be assigned to the first user that matched. So don't create overlapping ranges!
User Option | Type | Required | Description
--- | --- | --- | ---
GT | int | Yes | Greater Than - Weight must be greater than this value; this will be the lower limit for the weight range of the user
LT | int | Yes | Less Than - Weight must be less than this value; this will be the upper limit for the weight range of the user
SEX | string | Yes | Gender of the user (male / female)
NAME | string | Yes | Name of the user
HEIGHT | int | Yes | Height (in cm) of the user
DOB | string | Yes | Date of Birth of the user (in yyyy-mm-dd format)
Note: the weight definitions must be in the same unit as the scale (kg, Lbs, or jin).
# Home Assistant Setup
In the `mqtt:` block, enter as many blocks as users configured in your environment variables.
If you already have an `mqtt:` and/or `sensor:` block, do not create another one but simply add the "missing" bits under the relevant block header.
Note: Only weight entities are automatically added via the MQTT discovery.
```yaml
mqtt:
sensor:
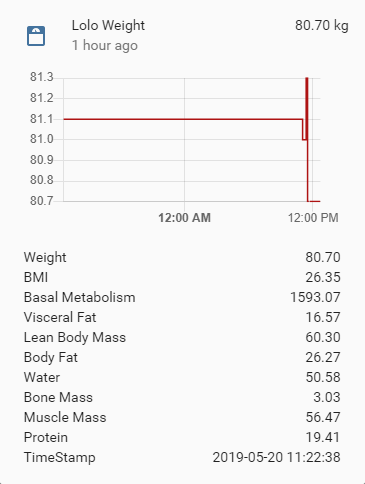
- name: "Example Name Weight"
state_topic: "miscale/USER_NAME/weight"
value_template: "{{ value_json['weight'] }}"
unit_of_measurement: "kg"
json_attributes_topic: "miscale/USER_NAME/weight"
icon: mdi:scale-bathroom
# Below lines only needed if long term statistics are required
state_class: "measurement"
- name: "Example Name BMI"
state_topic: "miscale/USER_NAME/weight"
value_template: "{{ value_json['bmi'] }}"
icon: mdi:human-pregnant
unit_of_measurement: "kg/m2"
# Below lines only needed if long term statistics are required
state_class: "measurement"
```
1. Open Home Assistant and navigate to the "Add-on Store". Click on the 3 dots (top right) and select "Repositories".
2. Enter `https://github.com/lolouk44/hassio-addons` in the box and click on "Add".
3. You should now see "Lolouk44 Add-Ons" at the bottom list.
4. Click on "Xiaomi Mi Scale", then click "Install".
5. Under the "Configuration" tab, change the settings appropriately (at least MQTT parameters, user properties, and MAC address), see [Parameters](#parameters).
6. Start the Add-on.
## Important:
If using the Add-On outside of Home Assistant Operating System / through a docker container, make sure the dbus is shared with the container running Home Assistant. This is typically done by adding the following line in your docker run command:
`-v /var/run/dbus/:/var/run/dbus/:ro`
or the following lines in your docker-compose file:
```
volumes:
- /var/run/dbus/:/var/run/dbus/:ro
```
## Parameters
Option | Type | Required | Description
--- | --- | --- | ---
HCI_DEV | string | No | Bluetooth hci device to use. Defaults to `hci0`
BLUEPY_PASSIVE_SCAN | bool | No | Try to set to true if getting an error like `Bluetooth connection error: Failed to execute management command ‘le on’` on a Raspberry Pi. Defaults to `false`
MISCALE_MAC | string | Yes | MAC address of your scale
MQTT_PREFIX | string | No | MQTT topic prefix, defaults to `miscale`
MQTT_HOST | string | Yes | MQTT server, defaults to `127.0.0.1`
MQTT_USERNAME | string | No | Username for MQTT server (comment out if not required)
MQTT_PASSWORD | string | No | Password for MQTT (comment out if not required)
MQTT_PORT | int | No | Port of your MQTT server, defaults to 1883
MQTT_DISCOVERY | bool | No | Whether you want MQTT discovery for Home Assistant, defaults to `true`
MQTT_DISCOVERY_PREFIX | string | No | MQTT discovery prefix for Home Assistant, defaults to `homeassistant`
DEBUG_LEVEL | string | No | Logging level. Possible values: 'CRITICAL', 'ERROR', 'WARNING', 'INFO', 'DEBUG'. Defaults to 'INFO'
USERS | List | Yes | List of users to add, see below
Auto-gender selection/config: this is used to create the calculations such as BMI, Water/Bone Mass, etc.
Here is the logic used to assign a measured weight to a user:
- If the weight is within the range of a user's defined values for GT and LT, then it will be assigned (published) to that user.
- If the weight matches two separate user ranges, it will only be assigned to the first user that matched. So don't create overlapping ranges!
User Option | Type | Required | Description
--- | --- | --- | ---
GT | int | Yes | Greater Than - Weight must be greater than this value; this will be the lower limit for the weight range of the user
LT | int | Yes | Less Than - Weight must be less than this value; this will be the upper limit for the weight range of the user
SEX | string | Yes | Gender of the user (male / female)
NAME | string | Yes | Name of the user
HEIGHT | int | Yes | Height (in cm) of the user
DOB | string | Yes | Date of Birth of the user (in yyyy-mm-dd format)
Note: the weight definitions must be in the same unit as the scale (kg, Lbs, or jin).
# Home Assistant Setup
In the `mqtt:` block, enter as many blocks as users configured in your environment variables.
If you already have an `mqtt:` and/or `sensor:` block, do not create another one but simply add the "missing" bits under the relevant block header.
Note: Only weight entities are automatically added via the MQTT discovery.
```yaml
mqtt:
sensor:
- name: "Example Name Weight"
state_topic: "miscale/USER_NAME/weight"
value_template: "{{ value_json['weight'] }}"
unit_of_measurement: "kg"
json_attributes_topic: "miscale/USER_NAME/weight"
icon: mdi:scale-bathroom
# Below lines only needed if long term statistics are required
state_class: "measurement"
- name: "Example Name BMI"
state_topic: "miscale/USER_NAME/weight"
value_template: "{{ value_json['bmi'] }}"
icon: mdi:human-pregnant
unit_of_measurement: "kg/m2"
# Below lines only needed if long term statistics are required
state_class: "measurement"
```
 🠲
🠲  # Acknowledgements
Thanks to @syssi (https://gist.github.com/syssi/4108a54877406dc231d95514e538bde9) and @prototux (https://github.com/wiecosystem/Bluetooth) for their initial code. Special thanks to [@ned-kelly](https://github.com/ned-kelly) for his help turning a "simple" Python script into a fully fledged Docker container. Thanks to [@bpaulin](https://github.com/bpaulin), [@fabir-git](https://github.com/fabir-git), [@snozzley](https://github.com/snozzley), [CodeFinder2](https://github.com/CodeFinder2) [@MariusHerget](https://github.com/MariusHerget) for their PRs and collaboration.
# Acknowledgements
Thanks to @syssi (https://gist.github.com/syssi/4108a54877406dc231d95514e538bde9) and @prototux (https://github.com/wiecosystem/Bluetooth) for their initial code. Special thanks to [@ned-kelly](https://github.com/ned-kelly) for his help turning a "simple" Python script into a fully fledged Docker container. Thanks to [@bpaulin](https://github.com/bpaulin), [@fabir-git](https://github.com/fabir-git), [@snozzley](https://github.com/snozzley), [CodeFinder2](https://github.com/CodeFinder2) [@MariusHerget](https://github.com/MariusHerget) for their PRs and collaboration.